How to Find Wall Studs & Understand Tape Measure Diamond Marks
Published: September 20, 2026 • Written by Master Carpenter Jack Mercer • Fact Checked
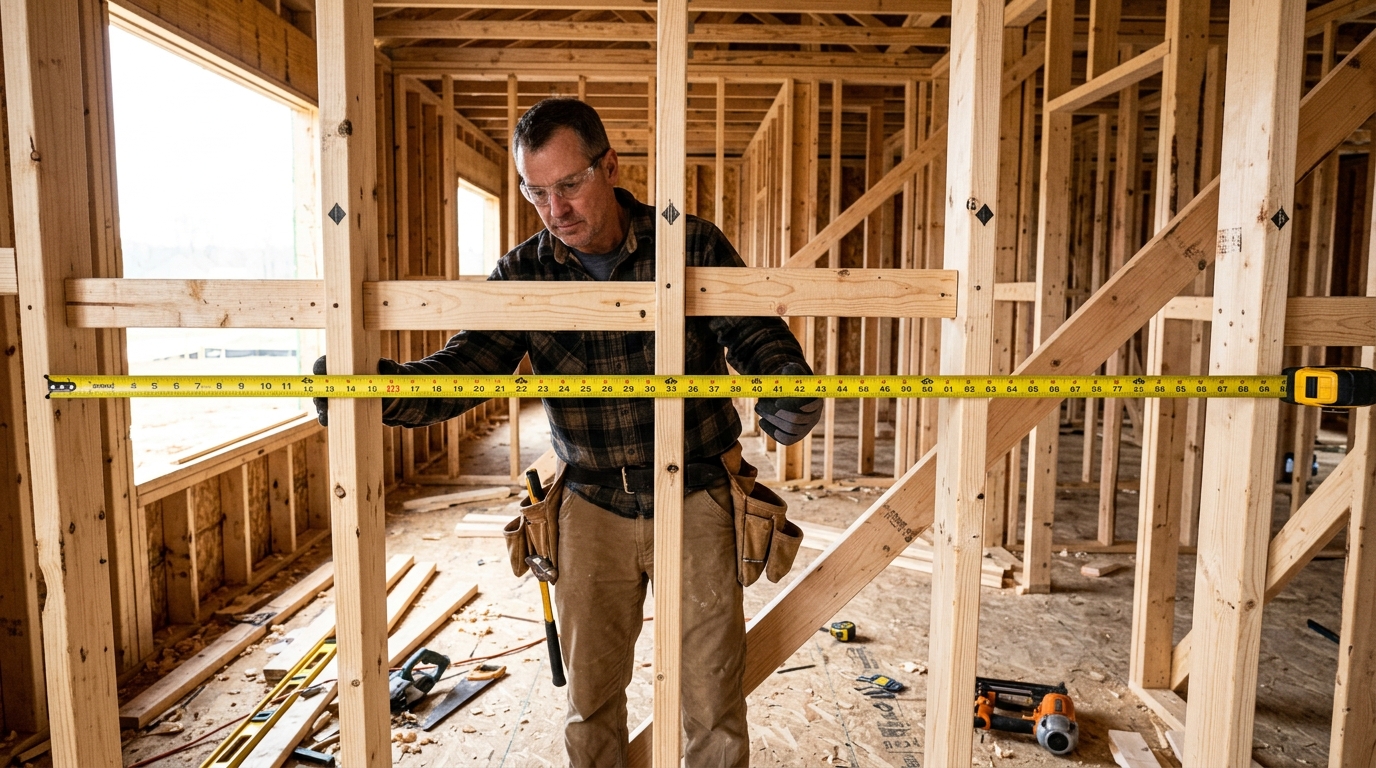
Mounting heavy televisions, kitchen cabinets, or floating bookshelves requires anchoring directly into the center of solid vertical framing members known as wall studs. While hollow drywall anchors have their place for lightweight pictures, driving fasteners into drywall alone will result in catastrophic wall failure under heavy load.
Every standard tape measure has specialized graphics designed specifically for framing carpenters: red highlighted numbers every 16 inches and small black diamonds every 19.2 inches. Understanding these markings enables you to predict exactly where studs hide behind finished drywall.
Standard 16-Inch On-Center (O.C.) Framing
Under the International Residential Code (IRC), interior and exterior load-bearing walls are conventionally framed with vertical 2x4 or 2x6 studs spaced 16 inches on center (O.C.). "On center" means the measurement runs from the exact physical centerline of one stud to the centerline of the next, rather than measuring the clear space between them.
Tape measures highlight these 16-inch increments with red square boxes or bold numerals at:
- 16 inches (1 ft 4 in)
- 32 inches (2 ft 8 in)
- 48 inches (4 ft 0 in) — perfectly aligns with the seam of a 4-foot drywall or plywood sheet
- 64 inches (5 ft 4 in)
- 80 inches (6 ft 8 in)
- 96 inches (8 ft 0 in) — the end of an 8-foot sheet
What Do the Small Black Diamonds Mean? (19.2" Spacing)
Look closely at your tape measure blade and you will notice small black diamonds (or black triangles) printed at regular intervals: 19.2", 38.4", 57.6", 76.8", and 96". Many homeowners mistake these for manufacturer printing quirks, but they represent an essential engineering standard: modular truss and floor joist spacing.
The Modular Math: Divide an 8-foot (96-inch) sheet of subfloor plywood or OSB by 5 equal spans:
96 inches ÷ 5 spans = 19.2 inches per span
Engineered I-joists and pre-manufactured roof trusses often use 19.2" O.C. spacing to save lumber framing costs while still ensuring that every 8-foot sheet edge lands centered on a structural joist without waste.
4 Field-Tested Ways to Locate Wall Studs
Even if you don't own an expensive digital wall scanner, you can reliably find studs using standard carpenter field methods:
| Method | Reliability | How It Works |
|---|---|---|
| Rare-Earth Neodymium Magnet | 98% (High) | Sweep a powerful magnet vertically across the drywall. When it snaps firmly to the wall, it has found a steel drywall screw driven into the stud. Find two screws in a vertical line to locate the exact center. |
| Electrical Outlet Reference | 90% (High) | Electrical outlet boxes and light switches are almost always nailed to the side of a stud. Tap lightly on both sides of the plate; the solid side indicates the stud. Measure 16" horizontally from that edge to find adjacent studs. |
| Acoustic Knuckle Tap | 70% (Medium) | Tap your knuckles along the wall. Hollow hollow hollow... suddenly dull and solid. The solid thud indicates a framing member. |
| Baseboard Nail Inspection | 85% (Medium-High) | Look closely at the top edge of your baseboard molding for tiny filled nail dimples. Finish carpenters aim their nail guns directly into the wall studs. |
Watch Out: Studs vs Plumbing & Electrical Conduits
One critical safety hazard on older homes is confusing a vertical cast-iron waste pipe or electrical conduit chase with a wooden wall stud. Modern electrical wiring runs through holes bored through the center of 2x4 studs. Building code requires steel nail plates over any notch or hole closer than 1-1/4" to the stud face.
If your drill bit encounters stiff metallic resistance after penetrating 1/2" of drywall, STOP IMMEDIATELY. You may be striking a protective steel plate over a live wire or pressurized copper water line.